
Under Stairs Desk: How to Turn Dead Space Into a Focused Workspace
Most under stairs spaces fall into one of two categories.
Table Of Content
- Why Under Stairs Spaces Actually Work
- The 5 Design Constraints You Need to Solve
- 1. Ceiling Height & Positioning
- 2. Lighting (This Makes or Breaks It)
- 3. Depth & Legroom
- 4. Storage Without Clutter
- 5. Cable Management
- Layouts That Actually Work
- The Minimal Nook
- The Built-In Setup
- The Hidden Desk
- The Creative Corner
- Materials & Colour Choices That Open the Space
- What Most People Get Wrong
- Final Thought
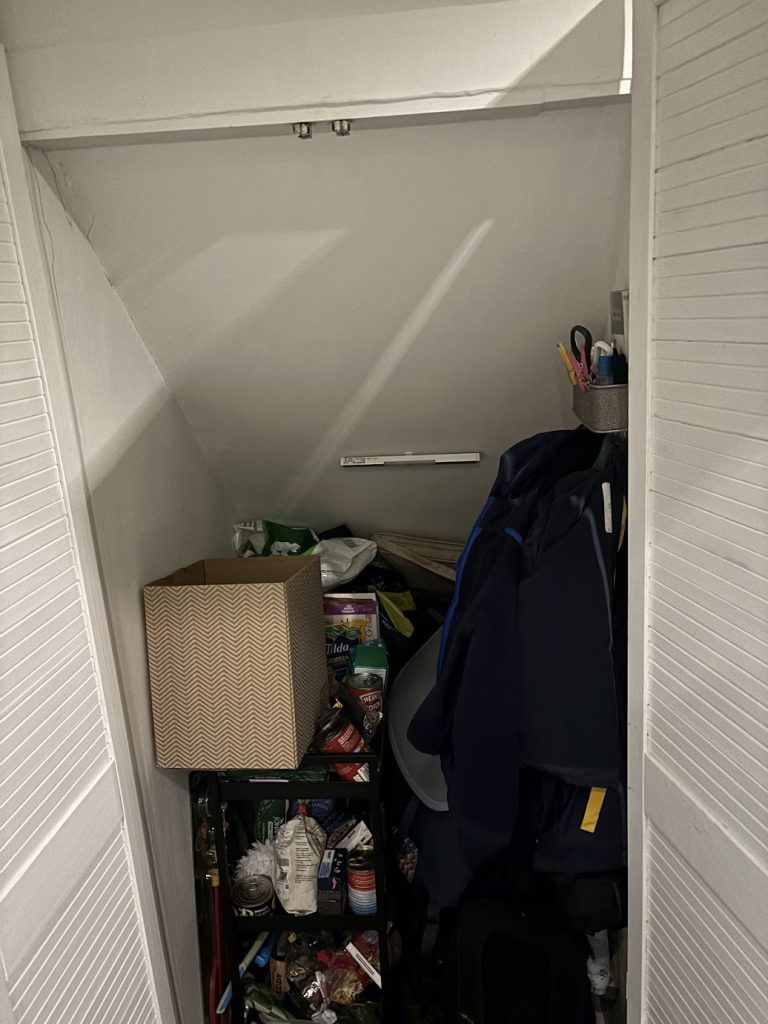
They’re either:
- A dumping ground for things that don’t belong anywhere else
- Or an awkward void that never quite gets used
But with the right approach, this overlooked part of your home can become something far more valuable:
A workspace that’s naturally focused, contained, and intentionally designed.
Not bigger. Not louder.
Just… better.
Why Under Stairs Spaces Actually Work
At first glance, it doesn’t seem like an ideal place to work.
Low ceilings. Limited light. Odd angles.
But those exact constraints are what make it powerful.
An under stairs desk setup naturally:
- Reduces visual distraction by enclosing your space
- Creates separation from the rest of the home
- Encourages simplicity because you physically can’t overfill it
In a world of oversized desks and endless accessories, this kind of constraint is rare.
And when it’s used properly, it leads to something most setups lack:
Clarity.
This becomes even more important in compact homes, where every design decision carries more weight — something we explored in our approach to designing a tiny house desk that actually works.
The 5 Design Constraints You Need to Solve
This is where most setups fail. Not because the idea is bad — but because the design isn’t considered.
1. Ceiling Height & Positioning
Don’t fight the slope. Use it.
Position your desk where the ceiling is highest — this sounds obvious, but it’s often ignored. Sitting even slightly too far under the slope creates a subtle discomfort that builds over time.
Use the lower section intentionally:
- Storage
- Shelving
- Soft lighting
Let your working position feel open, even within a tight space.
2. Lighting (This Makes or Breaks It)
Most under stairs desks feel cramped because they’re badly lit.
Overhead lighting alone won’t cut it. Instead, layer your lighting:
- A warm ambient source to soften the space
- A focused task light for actual work
- Optional LED strips to lift darker corners
Done right, lighting doesn’t just help you see — it changes how the space feels.
3. Depth & Legroom
Shallow desks are a common mistake.
Yes, space is limited — but going too minimal makes the setup unusable.
Aim for:
- Enough depth for a laptop + breathing room
- Clear, uninterrupted leg space
Wall-mounted or floating desks tend to work best here, keeping the footprint light without sacrificing function.
4. Storage Without Clutter
In small spaces, clutter multiplies instantly. The solution isn’t more storage — it’s smarter storage.
Focus on:
- Vertical shelving that follows the slope
- Built-ins where possible
- Keeping the desk surface itself as clear as possible
If everything has a place, the space stays calm.
This is the same principle behind a minimal desk setup for small, calm spaces — where the goal isn’t less for the sake of it, but less to create clarity.
5. Cable Management
In a tight setup, cables ruin everything.
They’re more visible. More intrusive. Harder to ignore.
This is where intentional design matters most. Mount power sources out of sight, route cables cleanly, and keep only what you need. If you want a deeper breakdown, we’ve covered exactly how to hide desk cables in a way that keeps even the smallest setups clean and distraction-free.
Layouts That Actually Work
You don’t need endless inspiration. You need a clear direction. These are the setups that consistently work well under stairs.
The Minimal Nook
- Laptop
- Lamp
- Nothing else
This is the purest version.
It follows the same principles we explored in our guide to creating a minimal desk setup for small, calm spaces — where less isn’t about restriction, it’s about focus.
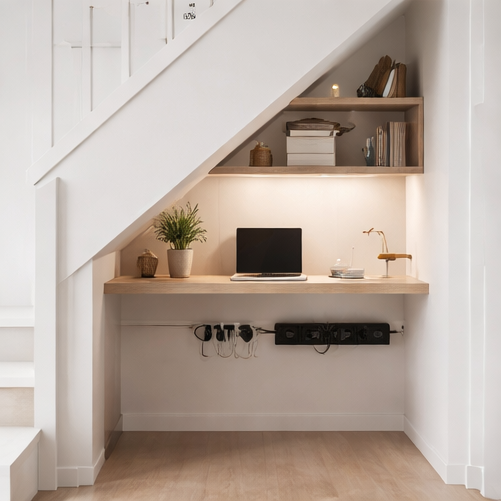
The Built-In Setup
- Desk integrated into the structure
- Shelving that follows the slope
- Everything aligned and intentional
This turns the space into something that feels permanent — not improvised.
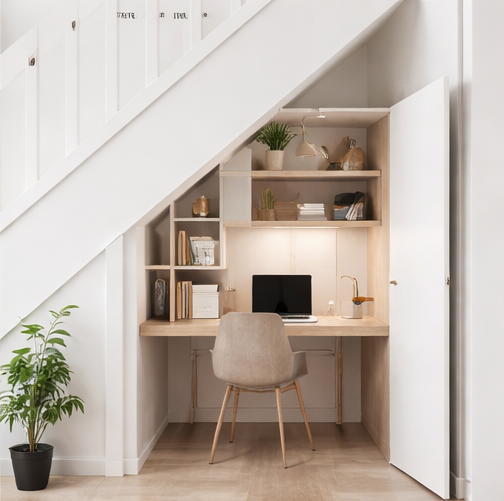
The Hidden Desk
- Concealed behind doors or panels
- Completely disappears when not in use
Ideal if you want the option of a workspace without it dominating your home.
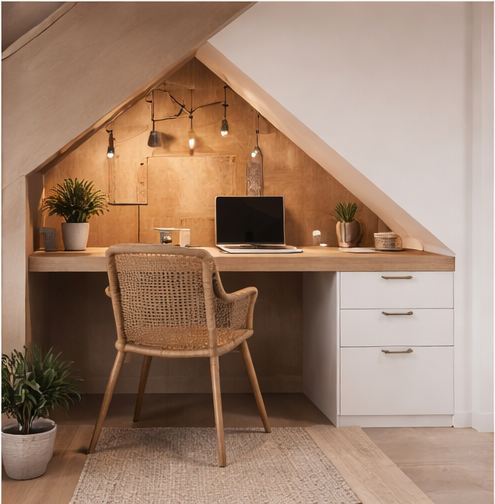
The Creative Corner
- Warmer lighting
- Texture (wood, soft finishes)
- A small number of personal elements
Still minimal — but with more atmosphere.
Materials & Colour Choices That Open the Space
When space is limited, your material choices matter more.
Go too dark or too busy, and the area closes in.
Instead, focus on:
- Light, neutral tones to reflect light
- Natural materials like wood for warmth
- Matte finishes to reduce visual noise
The goal isn’t to make the space feel bigger than it is.
It’s to make it feel calm within its size.
What Most People Get Wrong
This is where good ideas fall apart.
- Treating it like a backup desk instead of a real workspace
- Overfilling it with accessories
- Ignoring lighting completely
- Letting cables take over
- Designing for looks, not actual use
Most setups fail because they focus on adding more, instead of designing better — a mistake we see across small workspaces in general.
Final Thought
The best desk setups aren’t always the biggest or the most expensive.
They’re the ones that are designed with purpose and sometimes, that starts in the space you nearly ignored.
If you want to keep refining your setup, explore more guides across Deskfully — from designing a tiny house desk that actually works, to building a minimal desk setup for small, calm spaces, or learning how to properly hide desk cables.


")
